
Perfect Prime Rib Guide
Spoon Tender Results

I have cooked probably 50 rib roasts this year in an effort to master the holiday classic. I am really putting in the work for everyone, and eating all of this meat was a challenge, but don’t worry, I do it for the people.
Everyone has their way of cooking a prime rib. And many times, their results are great, so don’t take this as a knock on your “way,” instead look at this as a guide to perhaps introduce some new techniques, which will not only make it tastier but will also make it easier to cook.
CLICK ON THE VIDEO LINK FOR VIDEO INSTRUCTIONS
HERE IS THE FULL VIDEO WITH WRITTEN INSTRUCTIONS —> VIDEO LINK
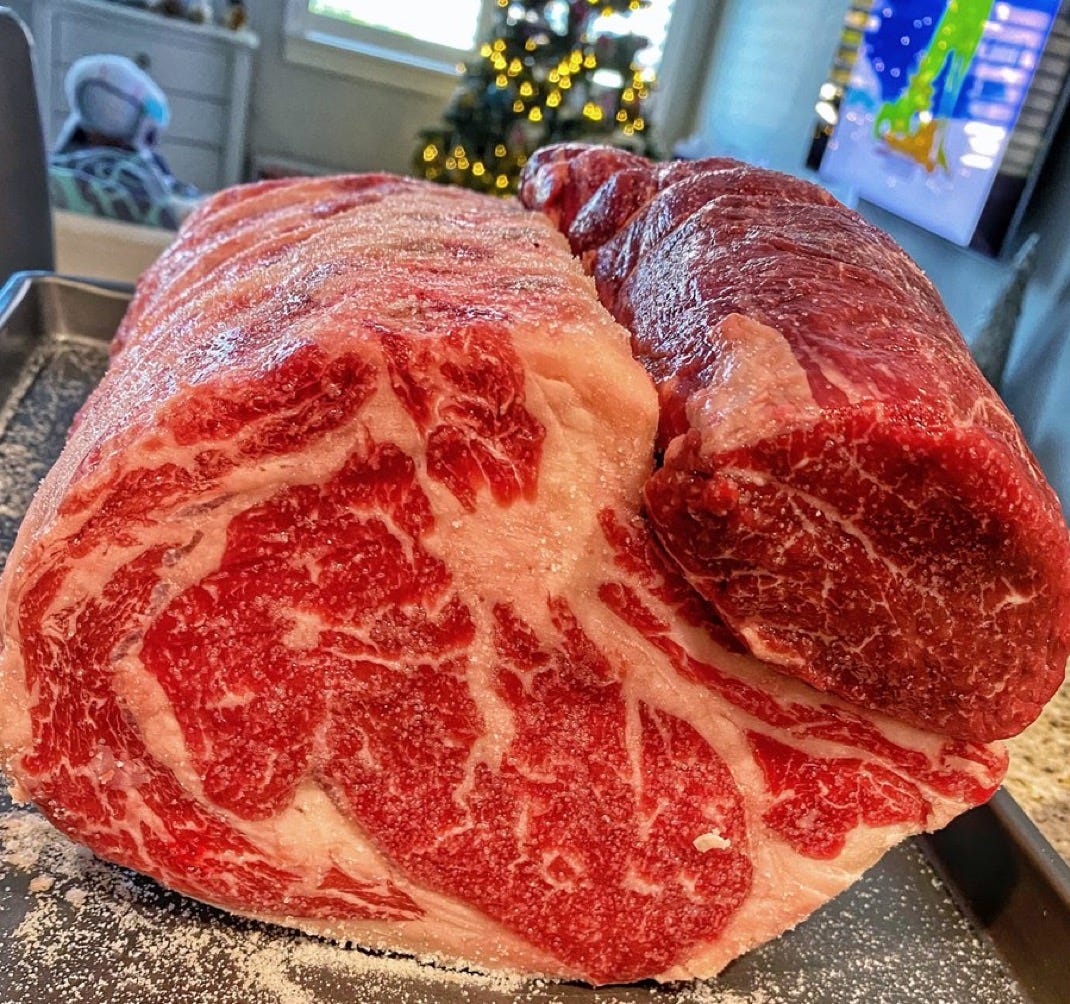
Step 1: Picking the Right Cut
I like to go with a bone-in-rib roast. This is not because the bone flavors the meat, it doesn’t; instead I like that the bone allows the meat to cook more evenly. In addition, I like to eat the meat off the bones after slicing. It still works great with a boneless roast, but if you have the option, go with bone-in.
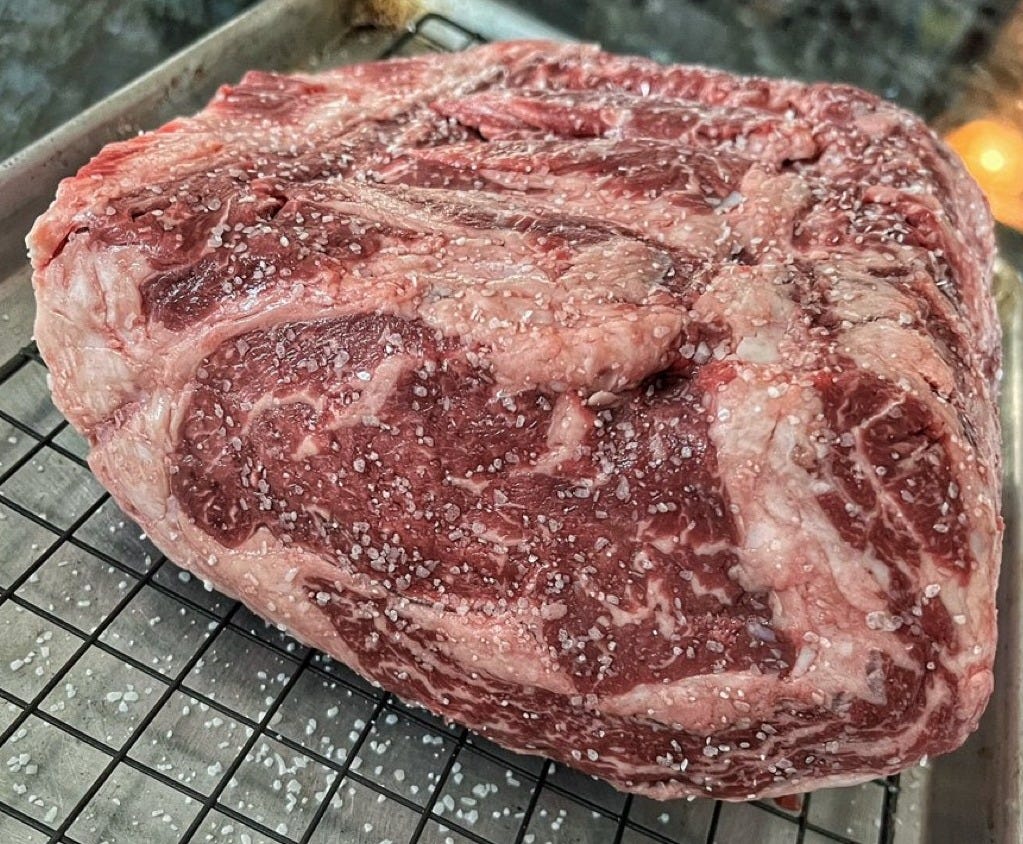
Step 2: The Pre Salt - aka The Dry Brine
Brining is typically done in a wet salt water solution. The idea is to season the inside of the meat with the salt. Via diffusion (think osmosis), the salt and water is absorbed into the meat during the brining process. Then when you cook your meat, the protein or muscle fibers retain more moisture when they cook (or tighten). The protein strands retain more moisture because they are denatured during the brining process, which means they don’t tighten as much as they cook. It’s this tightening that squeezes the moisture out of the meat.
The problem with doing this in liquid is that it waterlogs the meat,and in the case of beef, it dilutes the flavor. This is why the dry brine is better. The salt still penetrates the meat, breaks down the muscle proteins and protects the meat from the inside while it cooks. Salt is the only thing that can penetrate these cells, so we don’t add any flavoring to the dry brine. The flavor compounds can not make their way into the meat.
Step 3: The Slow Roast
There is an old theory that if you sear the meat first, it seals in the juices. This is actually 100% false. In order for anything to brown, you must remove the moisture, so in actuality, by searing first, you are drying the meat out quicker. In addition, the high hard heat is overcooking the exterior of the beef while the interior is still raw. This is why a roast that’s cooked at a high temp has layers of color from the outside to the inside, traditionally grey, then lighter grey, to pink then red. This is precisely what you DON’T want when it comes to a great roast. Instead, you want a beautifully browned exterior with a nice, even, rosy color from edge to edge after slicing.
This is why the low and slow cook works so well. You are slowly heating the meat, allowing the inside and outside to cook at one even pace. In addition, by cooking at a lower temperature, the meat proteins are more gently denaturing, keeping the meat moist and tender. The higher the heat, the drier the beef.
I start the roast in a 225F oven and cook it until the internal temp hits around 120 F then move onto the next step. (you can go even lower, but some ovens will turn off)
*Note: I like to roast the beef on a roasting rack so the air can circulate around the meat.
Step 4: The “oven sear”
When the internal temp has hit 120 for med rare, I remove the meat from the oven, blast the temp to 500 or broil, and apply my seasoning at this point. I like a simple rub of fresh thyme, oregano, chives, fresh cracked black pepper, roasted garlic (crushed into a paste) and some ancho chili. I mix all this with melted ghee (or butter) then rub all over the meat. Once the oven has hit that high temp (this may take 15 min to get up to full temp), I place the roast back into the oven and cook until the internal temp hits about 125-130 for medium rare.
Step 5: Rest and Rub
Now, onto the most crucial step: resting. Most people are motivated to slice the steak right away, however, you must rest the meat for at least 20 minutes to let the moisture inside the meat settle a bit, otherwise you will end up with a pool of juices all over your cutting board. Tent the roast under some aluminum foil while it rests to keep it warm.
Step 6: Slice
The key to a nice slice is to use a long knife and avoid sawing the meat. Long slices work best with a large roast. As you slice the meat, and some of the juices run off, you can add these back into a pan and simmer with a touch of butter to drizzle over the slices of meat.


Enjoy!
Frequently Asked Questions:
How much should I buy?
If you go with a bone-in roast, assume roughly 1 lb per person. So, a 5 lb bone-in roast should serve 5 people. For boneless, go with 8 oz per person.
How long can I “dry-brine”?
Try to do at least 12-24 hours, but you can go up to 48 hours.
Should I dry brine covered or uncovered?
You want to do this uncovered. This will dry out the exterior, which allows for a better sear.
How long will it take?
For a 5 lb roast, the slow roast process can take up to 3.5 hours at 225F
Can I do the slow portion in the smoker or on the grill?
Certainly! This is even better. If it’s on the grill, try and use the second tier and watch the heat closely.
What type of salt should I use?
I like to cook and season with Kosher salt and finish with sea salt.
Roughly how long will this take?
4-4.5 hours for med rare
Help Mine is only 3.5 lbs just two of us how long and @225?
Any suggestions for leftovers?